Android Studio tutorial will discuss about the work area from the Android Studio itself, so that later you will know him well. I assume you've read the two articles I wrote earlier, that is why you are using editor Android Studio not Eclipse or any other, in the article I also had to explain the advantages of Android Studio editor in comparison with other editors. While the second article I also have discussed about any software or hardware is needed to support Android Studio in order to run properly. For those of you who are common and want to learn about android-based programming using Android Studio editor I recommend reading the article I mentioned beforehand.
Well I will continue this discussion; the general look of Android Studio is like an existing image below.
If you look at the picture above, the display of the work area Android Studio actually not much different from the other programming languages editor. Where on the Android Studio workspace consists of:
- Feature Shortcut or Icon in the form of an image that serves as a shortcut to get to certain commands.
- Window directory which is useful to know the moment you're where the directory when accessing the work area.
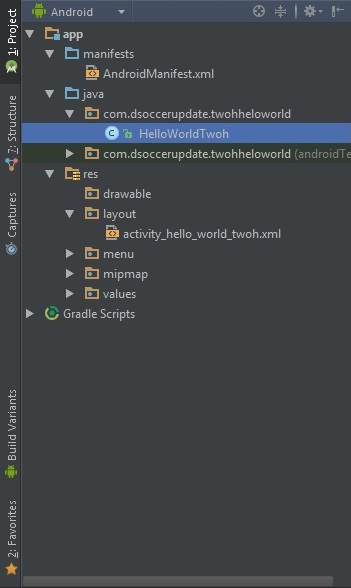
- Window project panel located on the left that contains the following files supporting projects that you can run android apps.
Usually on a project consisting of an APP file in which includes:
- Manifests: in the manifest file is usually composed of a manifest.xml file in a project that serves as the main program that governs the whole in a project from design view to the source code.
- Java: This java file serves as a place to store the files java where we know that the android programming written using Java language.
- Res: res file is usually used as a place to store supporting files in a project-based android from images that are usually stored in the directory drawable, xml files to create the design of an application stored in a directory layout, file menu, mipmap, and values.
- Palette window: This window is the tool used to design android based applications, ranging from Layouts, widgets, text fields, containers, date & time, Expert, and Custom.
- Workspace: This is exactly what is called the work area on android studio, located on the middle of the two main options, namely the design and text. Where the design window function to see the design directly from the application that we created, while the text window is used to write program code in the form of xml file.
- Component Tree window: This window on the top right of the android studio that serves to see the structure of a project that we create.
- Window properties: This window also is on the right which serves to set the properties of an object in the application.
- Status bar: located at the bottom of the android studio that serves to determine the error message and also the good status of the project that we create or update of android studio itself.
Those are some important points you should know the fundamental of android studio work area, the aim is that you will be able to work well with the editor of this one. For those of you who want to get this article in the form of a pdf file can be downloaded here. Thank hopefully this article can provide benefits for those who are learning android programming languages, suggestions and constructive criticism so I am looking to forward.


0 comments:
Post a Comment